Sunday, November 13, 2016

MY FAMOUS GRAVY-SIMMERED PORK CHOPS

So good that even Zhu Ba Jie himself would gladly devour them! (Which would amount to cannibalism in his case.)

These were a favorite of my old friend and roommate, Cat Panavan, during our days on NYC's Upper West Side.

Dredge your chops in flour that's seasoned as you like (I keep it simple with salt and pepper), brown on each side in cooking pan with oil of choice. 


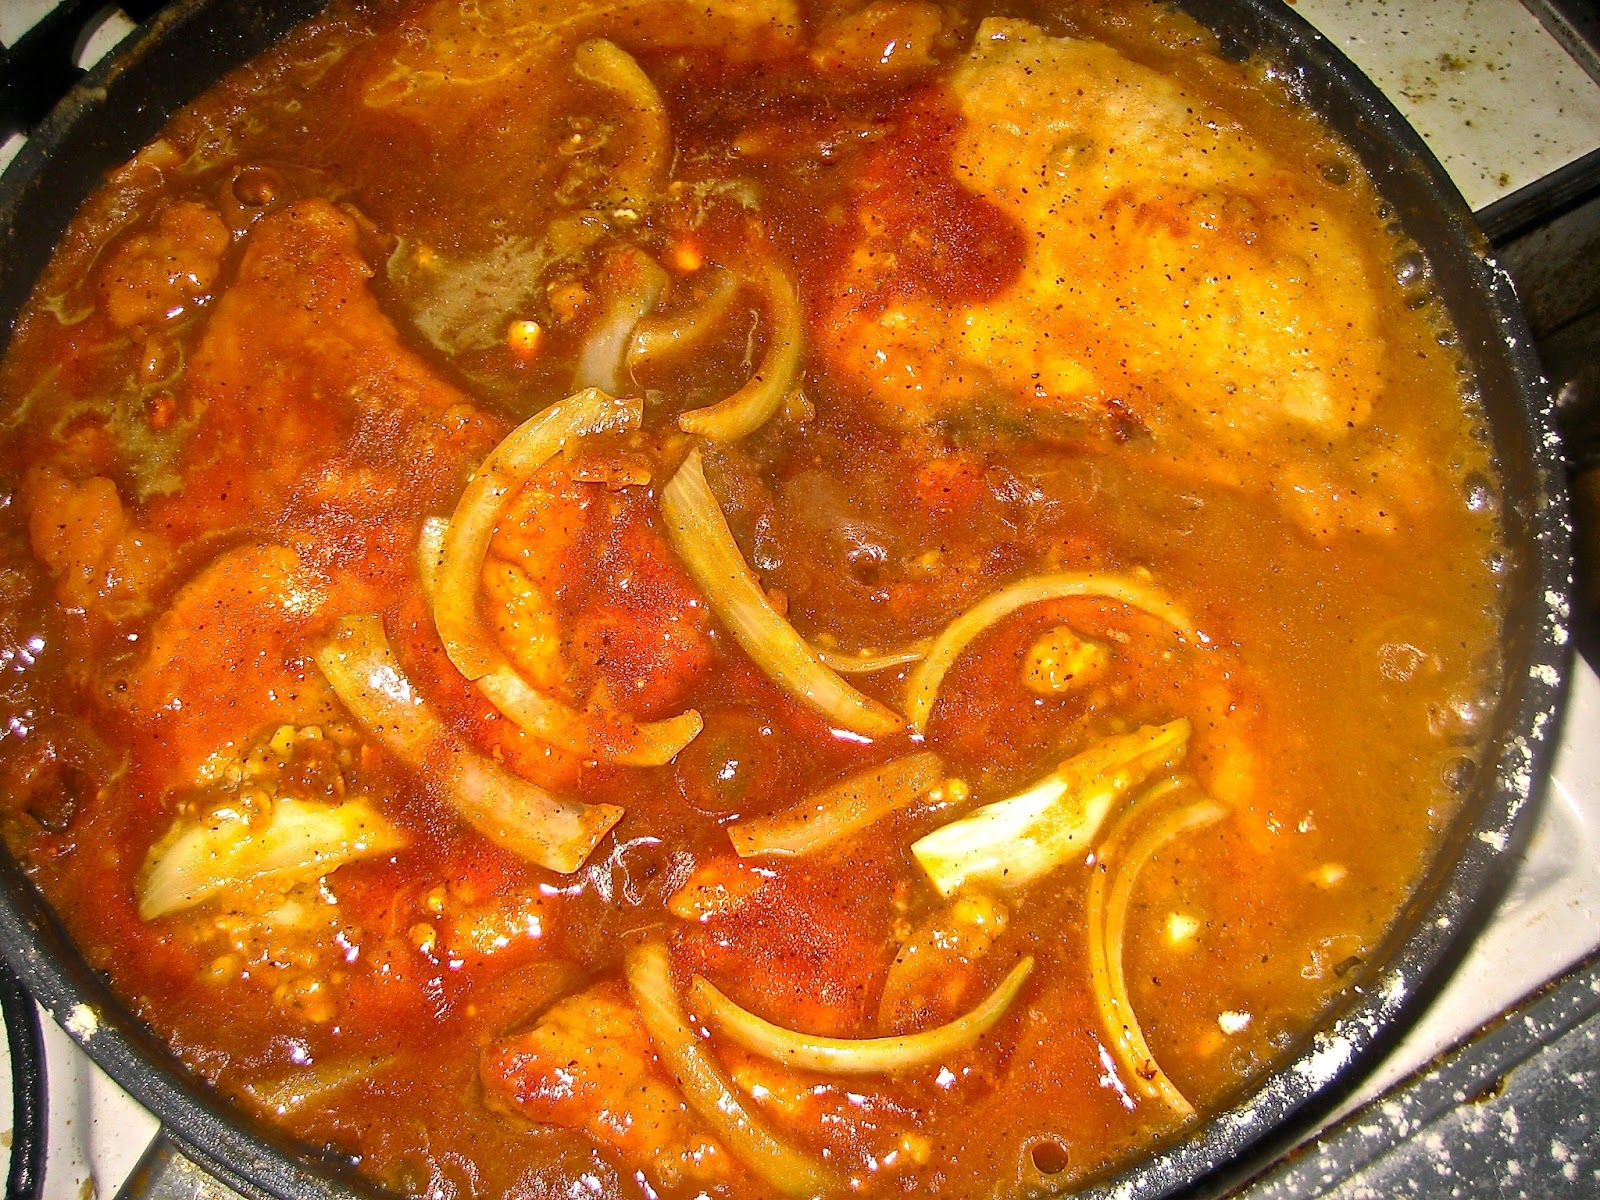
Add smashed garlic cloves (however much you like), chopped onions, and chicken stock (or water). Once everything comes to a boil, sprinkle with a bit of flour to start the gravy, then cover. 

Set flame to low and occasionally check to maintain the level of liquid that you want so you have enough gravy at the end, and cook until the meat is fork-tender. (You should not require a knife at the end.) Also, don't forget to occasionally swish the chops around in the pan to prevent them sticking in the gravy. Oh, and don't forget to flip them at some point while adding more chicken stock to maintain the level of gravy you want at the end. The cooking process will cause some of the stock to reduce, so keep an eye on it.

The version with water and without the onions.

The end result.

When done, remove from heat and let sit covered for at least another ten minutes before plating. Serve with rice or hearty noodles and don't forget to slather everything with the gravy!

Thursday, January 24, 2013

SLOW-COOKED OVEN BARBECUED RIBS

INGREDIENTS:

Pork spareribs
Beer (I recommend Budweiser)
Brown sugar
Adobo
Water
Dr. Pepper (optional)
Liquid smoke
Cheap barbecue sauce (though Open Pit is always recommended)
Honey
Brown/Deli mustard (Gulden's or Nathan's both rock)
Garlic powder (I prefer Badia brand)
Hot sauce (optional; I favor either Indi-Pep or Red Devil, but just about anything will work)

One of my signature favorites is barbecued ribs that are slow-cooked in the oven, resulting in the meat being so tender that it falls from the bone like pulling a finger from a velvet glove. It's very simple to prepare and a real crowd-pleaser, so here's how you do it.

Get yourself a family pack of ribs and cut them into individual ribs. Place the separated ribs into a large freezer bag and fill with beer, preferably Budweiser or something with a flavor that won't overwhelm the meat, and seal the bag. Leave this in the fridge overnight and it will simultaneously tenderize the meat and imbue it with flavor.

When ready to cook, pre-heat the oven to around 350 degrees. Rub the ribs with liberal amounts of brown sugar and adobo, then place in a deep tin baking pan, at the bottom of which you have added about a half-inch of water or Dr. Pepper. (I recommend using one of the disposable pans you can find in your supermarket's baking aisle.) Then jot about a quarter of a 3.5-ounce bottle of liquid smoke over the ribs; you won't need much, as a little of that stuff goes a long way. Tightly seal the pan with heavy-duty aluminum foil, preferably one piece so it's as air-tight as possible. Hold both ends of the pan and lightly slosh it around to spread the seasonings and allow the liquid smoke/water/Dr. Pepper to fully coat the ribs. Place pan in oven and let the ribs cook at 350 for about an hour or so, or until you can smell them cooking. At that point, drop the temperature down to around 300 and leave it alone at that temperature for approximately another two and a half hours. By the end, your kitchen (and home) will reek of liquid smoke and your family/guests will be going mad.

While the ribs are doing their thing, take as much cheap barbecue sauce as you may need and put it into a big pot. Blend in the honey and mustard to taste and add a huge motherfucking shitload of garlic powder. Blend until somewhat smooth but thick, and keep in mind that the flavor should be sweet and garlicky. At this point it's up to you to add hot sauce if you want a bit of a kick to the concoction; if you seek that flavor I recommend Indi-Pep West Indian pepper sauce, but you use what you like (except for the green Emeril sauce; it's tasty but it will throw off the color, and the shit is pointlessly expensive).

Once the aforementioned cooking time is up, remove the pan from the oven, unseal the ribs and pour off the juices. Then pour the sauce all over the ribs and return to the oven unsealed. Allow to cook for another half-hour, after which you are ready to roll. I advise letting the ribs cool a little, but they should be ready to eat and fork-tender. If they are not fork-tender, return to the oven at around 325 for as long as it take for them to reach that consistency. Ovens vary, as does the individual's preference for meat tenderness, so bear those factors in mind.

A finished example.

Lastly, a small caveat: Once you become known for having made these ribs, your name will become legend among family, friends, and neighbors and you will be begged to make them for every party or barbecue that you are invited to, so be ready for that burden. Or you can be a lazy turd and just pass on this recipe. Either way works. And also keep in mind that this is my basic version of it, which can be tweaked so you can make it your own personal sort of flavor. Be creative and have fun with it!

Wednesday, February 15, 2012

MIGHTY OXTAIL STEW-revised 2012 version

NOTE: this recipe is a revised version of the one I posted in March of 2010. If you still have that one bookmarked or printed out, chuck it. Trust me, this one is a marked improvement on what came before!

I love me some slow-brewed oxtail stew, a hearty mainstay in the cuisine of many cultures, and my own version of it derives from the Chinese and Jamaican varieties. Loaded with beefy goodness, vertebrae that are incredibly flavorful when sucked on after cooking, corn, peas, onions and beans, this is tasty as a motherfucker, very filling and will make you drop a tree trunk-solid turd as big and heavy as your head. And this same recipe can be used for curried goat or lamb as well!

INGREDIENTS

1 box S&B Golden Curry Sauce mix (3.5 ounce pack)
Curry powder (brand is irrelevant, though I do favor Jamaican Choice or Badia)
Oxtail in inch-thick sections (2 pounds)
2 pounds chuck beef for stew
Beef broth (enough to cover the oxtail, with four inches extra)
2 large onions
2 cubes beef bullion (I favor Maggi brand)
4 smashed cloves of garlic (but if you enjoy more, go for it)
2 cans dark kidney beans (drained)
1 can lima beans (optional)
1 standard-size package of frozen peas
1 standard-size package of frozen corn
2 potatoes (diced to cook's preferred size)
3 bay leaves
Salt (optional, to taste)
Pepper
Corn starch (for thickening at the end)
Trappey’s Indi-Pep hot sauce (optional)
2 Scotch bonnet peppers (optional and absolutely not for anyone who can't handle intense spicy heat)

How to make dis shit, Mon

• Chop up your onions into decent-sized hunks, nothing fancy because it’ll all melt into the mixture eventually. Smash your garlic with the flat of a large cooking knife or cleaver. Have chopped onions and garlic at the ready to add when things come to a boil.

• Drop the oxtail and chuck beef into a big stew pot and add enough beef broth to cover it, allowing a depth of roughly four inches above the meat. Bring to a boil and add S&B Curry Sauce mix. If necessary, add salt and pepper. (Have the curry powder at the ready, in case you want to pump the curry flavor through the roof; this will mellow considerably when the stew is done and it "finds its flavor." Some curry powder brands have a certain amount of salt already in the mix, so taste the broth to see if you need to tart things up with the salt and pepper.)

• Add onions and garlic and drop heat to a simmer.

• Add beef bullion, bay leaves, beans, potatoes, peas and corn. Stir until well blended and allow to simmer, uncovered.

• Simmer until the meat is fork tender. If the concoction is not thick enough for your liking, add a handful (or two) of corn starch, stir in well and allow to simmer until it's thickened enough to make you happy. Remove from heat and if possible allow to sit in the fridge overnight to “find its flavor” — it’s good fresh off the stove, but the overnight thing really punches up the richness.

NOTE: The hot sauce is only recommended for those who want the stew to have a bit of “kick,” and Indi-Pep is suggested because it’s got a real West Indian flavor rather than a burn-your-asshole-out spice assault. If you chose to use it, lose that dash-regulating white bit of plastic that tops the open bottle and dump about half the bottle into the stew once it's begun simmering. It’s got some heat, but it won’t kill your pets or children. However, if you don't mind going down for child abuse or cruelty to animals, you can really add heat by including two perforated Scotch bonnet peppers at the start of the simmer. (The Scotch bonnets must be perforated so steam does not build up in them and cause a potentially messy pressure-generated explosion in your pot. Plus, the perforation allows the flavor to more efficiently blend into the whole mix.)

You can serve this over white rice or noodles or with crusty bread, but I go for it as a stand-alone soup or stew. And whatever you do, suck the marrow side of the bones. The broth will have been absorbed deep into the bones and sucking out that flavor is one of life's great joys. I shit you not!

An example of the completed deliciousness. NOTE: serve it in a bowl within a bowl, so you have someplace to dump the bones once you've sucked the meat off of them.

Monday, August 1, 2011

GONZO SPICY GREENS

Just the other day I handled the grill-jockey duties at a backyard cookout thrown by my friends Mark and Jen, and along with other items I brought a couple of side dishes, of which the one people kept asking me about was the collard greens. Kind of surprised that they went over so well, I promised a few of the attendees that I would write up the recipe and post it, so here it is.

One of the unfortunate common misconceptions about collards is that they are bland and tasteless. If your experience with them has been at Popeye's Chicken and Biscuits or at some random cheap inner city buffet, then you can be forgiven for turning your nose up at them. In nearly all of the times I've attempted to eat greens in a restaurant or takeout joint — and even a couple of pricey and "prestige" soul food joints — I've been sorely disappointed, and the sole exception to that rule was a better-than-average batch I had maybe sixteen years ago from the hot buffet at a Korean deli on Park Avenue during my Marvel Comics days. The recipe that follows is an amalgam of what I was taught by my mother, her mother (the late Nana Irene) and my grandfather's second wife, the older-than-dirt and still lucid Miss Willie-Mae (who's still kicking around and kicking culinary ass at 107), and with it you will disprove the common misconception and find yourself the shaman to a new-found legion of collard greens believers. And it's easy as hell to make (though admittedly time-consuming)!

INGREDIENTS
2 bunches of fresh collard greens
2 Spanish onions, chopped
Peeled garlic cloves (look for the fresh pre-peeled ones you can find in your market's produce aisle)
1 quart-sized (or thereabouts) bottle of apple cider vinegar (you won't be using all of that, but it's good to have that much on hand just in case)
32 ounces of chicken broth (I go with Swanson in the big box)
2 pounds of smoked ham hocks (can be substituted with smoked turkey wings/tails if you don't do swine)
Red pepper flakes

OPTIONAL INGREDIENTS (for the schmancy "serve this to the snobs" version)
2 or 3 decent-sized turnips, diced
Whole cream
1/3 pound of diced bacon (uncooked)

IMPORTANT NOTE: This is a time-consuming recipe, so do not attempt to make this if you intend to serve it in an hour or two. I'll get to the specific logistics as we go through the prep process. Oh, and make sure to read this whole recipe before getting started, just so you know what you're in for timewise and can prepare accordingly.

The base alone can take upwards of ten hours, depending on whether you make it in a soup pot on the stove or in a crock pot (the latter is the one that takes as long as ten hours), and then you have to simmer the greens for maybe two hours or more (depending on how firm you like them), and when all is said and done I recommend letting it all sit overnight.

STEP 1
The first step in this process is making the base. Pour the chicken broth into a soup pot or crock pot and add the smoked ham hocks (or smoked turkey wings), chopped onions and garlic cloves (which should be slightly smashed open to allow the liquid to seep through them during the cooking). Add enough of the apple cider vinegar to the soup pot to allow for about three inches from the top; with a crock pot, you'll only need an inch or an inch and half from the top. Bring the pot to a boil, cover and turn down the heat and allow to simmer until the smoked meat falls apart during the stirring (anywhere between four to seven hours in a soup pot, because most smoked meats end up as hard as petrified wood and require a slow simmer to re-hydrate and eventually soften again). With a crock pot, set it on "high," cover it, and then go about your business for at least the next eight-to-ten hours, opening it only maybe halfway through to stir, just in case. The crock pot version requires considerably more patience, but one also does not have to worry as much about compensating for loss of liquid boiled off during the long simmering process; in the case of the soup pot version, have at least two cups of water on hand to compensate for whatever boils off.

The meat in the base, falling apart after several hours of slow simmering.

When the meat is falling apart, turn off the heat and use a slotted ladle to remove all of the solids from the liquid base, along with any stray skin or fat that has floated to the top, and place all of that into a skillet or some other wide and shallow container that will allow the meat and such to be spread out for cooling. Once cooled, remove the bones, gristle and such from the meat and chuck it, leaving the meat behind, along with however much fat you may choose to leave in for flavor (you can chuck it all if you like, but I always leave some because I'm old school with the recipe).

The waste skin, bones and fat from two pounds of rendered ham hocks.

Waste fat skimmed from the top of a batch of base that I allowed to sit overnight before I moved on to the next steps. You don't have to do an overnight sit at this point; I did this particular batch when I only had time to do the base and then I had other things to do with the rest of the day, so I resumed the process the following day.

After that, what you want to have at the end of either the soup pot or crock pot versions is enough base to fill about two-thirds of a soup pot; by this point, all of the rest of this process will take place in a soup pot because you'll need the room once the greens go into the base.

STEP 2
Now we get down to the greens. Some recipes call for use of the leaves only, but I call bullshit on that. Other than the hard and thick central core from which the leafy stems grow, use all of the greens. One of the common mistakes when making greens is to chuck the stems, but they are loaded with nutrients and vitamins that make their way into the base, which becomes known as "pot likker" once the greens are added, so don't be a dumbass snob. (Think I'm kidding about the broth becoming something known as "pot likker?" Don't believe me? Google it!)

Leaves and stems, separated from the central core and ready to be cut to proper size for cooking.

The central cores of two bundles of greens; this stuff you can chuck.

When you have separated the stems from the core, lay the leaves out flat, like they were tobacco leaves. Then, take the leaves and shave them off of the stems with a sharp knife; when you're done separating the leaves from the stems, lay the leaves to the side and chop the stems down to small and manageable pieces, after which you'll drop them into the base.

Take the leaves that have been laid out flat and roll them in a move similar to how cigars are rolled. When you have what will amount to a leafy green cylinder, cut the cylinder into sections that are about one and a half to two inches in width and set them aside.

Leaves, with surplus onions and garlic, plus diced turnips for the schmancier version (more on that later).

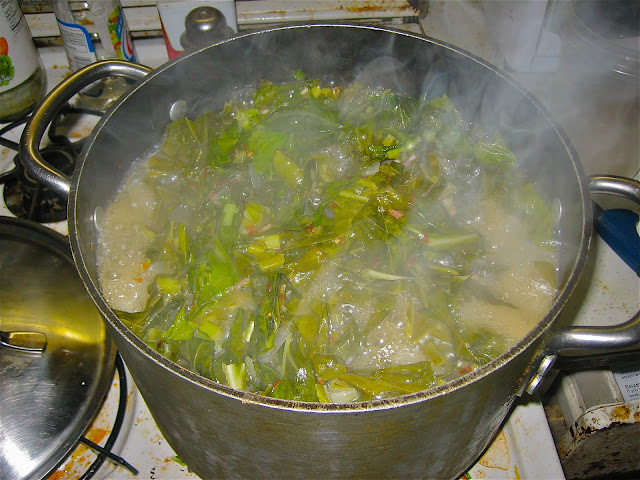
Bring the base to a boil and drop in the greens; they will shrink by a good percentage, so don't be concerned about them taking up more space than is available. Taste the liquid and add more onions and garlic if you feel it's necessary. Next, add vinegar to taste; I suggest adding enough to give it a strong tartish flavor and as the simmering progresses, taste it to see if you need to add more. Then, add red pepper flakes to taste; I recommend about two tablespoons to give it a memorable kick, but you may prefer more or less, so let your individual taste preference be your guide. Once it's all boiling, lower the temperature to simmer heat and cover, stirring occasionally. (If you feel it's losing too much liquid during the simmer, feel free to add water to compensate, but remember to taste and see if the seasoning also needs compensation.)

The simmer begins.

It will take an average of two hours or so before the greens are tender enough to suit the average palate, but those who prefer a tougher texture can turn it off after an hour and a half. (Those times are merely guidelines, so check the tenderness by tasting a leaf or two.)

The finished glorious mess.

By this point, the greens are said and done, but I suggest allowing it to cool and then refrigerating it overnight so it finds its flavor. Re-heat the next day and be ready for the sheer excellence!

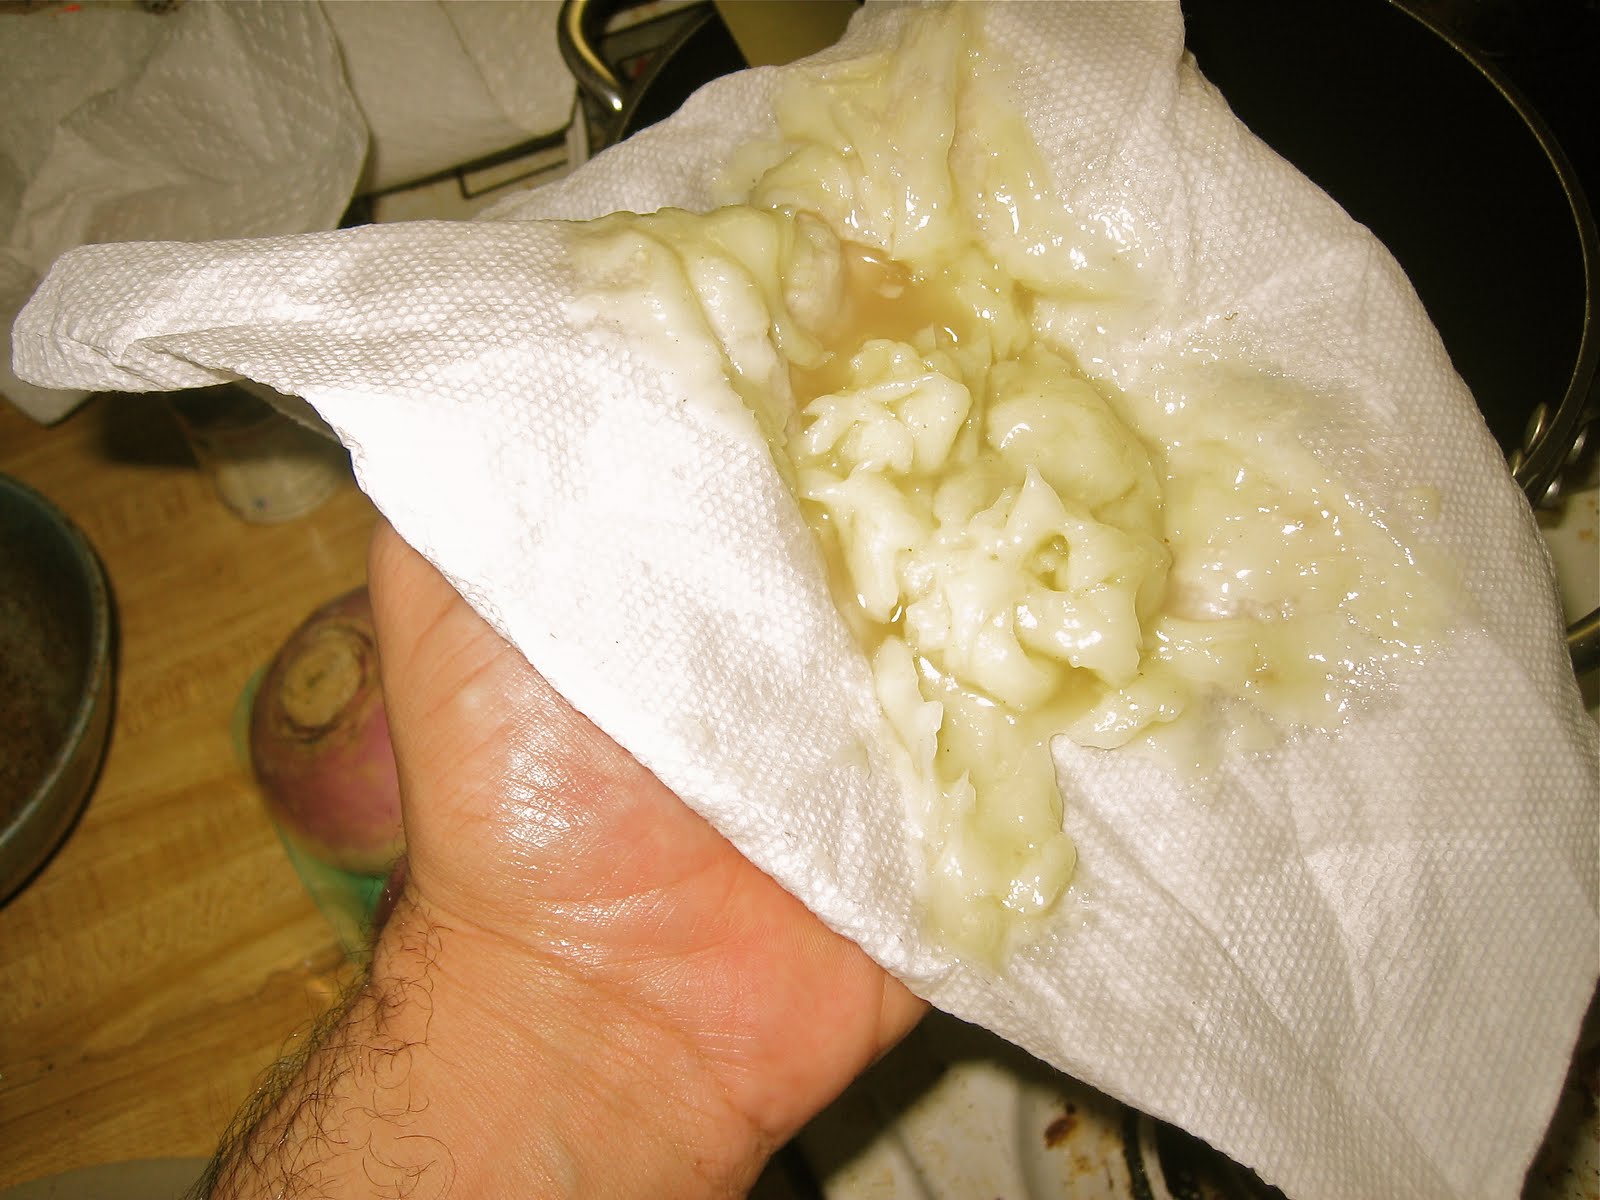
You can also make the aforementioned schmancier version that might be more appealing to diners who prefer tarted-up versions of what was originally slave chow. All you have to do for that is follow the regular recipe, but add diced turnips and bacon as you're about to bring the greens to a boil before reducing heat for the simmer. Follow the same recipe until about five minutes before it's all done, at which point you add the creme to taste, and then stir.

The turnips and bacon hit the broth in the schmancier variant version.

With the cream added during the last five minutes of simmering.

Allow it all to continue simmering for five more minutes and then that's it (with the cooling and overnight refrigeration also included). It's still delicious, but the difference is that the creaminess somewhat detracts from the stronger flavor of the straight pot likker. But whatever the case, this is a winner that will keep your guests talking and coming back for more.

"Fuck this shit, Prez. Bunche's greens blow this mess outta the goddamn water!"

Thursday, February 3, 2011

THE PERFECT GRILLED HAM 'N' CHEESE SAMMICH

A grilled ham and cheese sandwich as seen on Wikipedia: I'm sure this is okay, but I guarantee mine blows it away in smoldering chunks like it was some random monster in an episode of ULTRAMAN.

There are few "comfort" foods as beloved as the humble grilled cheese sammich, and when prepared with just the right combination of bread, butter and ham, it can be elevated from a fondly-remembered childhood favorite to a genuine work of low cuisine artistry. Delicious and alarmingly simple to make, here's what you need to do to craft this signature bit of loveliness.

First you have to get the right components, and chief among these is the bread. The right bread is what makes the difference between a proper grilled cheese and a mildly-acceptable greasy spoon staple fit only for dead-on-their-feet drunks at the ass-end of a pub crawl, and the bread you want is a loaf that looks like this:

The perfect bread.

This humble round loaf is often labeled as "country" or "peasant" bread and can be found at most decently-stocked supermarkets (you can likely find something of its ilk at a bakery or an Au Bon Pain franchise location if your supermarket of choice yields bubkes). I recommend the white variety as opposed to wheat since the wheat tends to overpower flavors that are not tweaked by white bread, and I also recommend that you take your slices from the middle of the loaf so you can make a long and wide sammich.

Butter the two slices on the sides that will not contain the sammich's filling, and for that I recommend Breakstone's salted whipped butter that's been left at room temperature until soft and easily spreadable. (It's perfect for having just the right amount of flavor as a cooking medium.)

Next, break out your non-stick griddle pan, one of those square and shallow skillets used for making pancakes (provided you have one; if not, a standard non-stick pan will do, as long as the bread can fit with ease). Set one of the pieces of buttered bread butter side down on the griddle, and on top of that add two or three slices of Boar's Head American cheese — sliced as thin as possible; this is important, so be sure to specify with your deli guy — enough to cover the bread all the way across. Then add two or three slices of Boar's Head ham — also sliced as thin as possible — in the same configuration as the cheese, and then top that with a repeat layer of cheese. This may seem like a lot, but at this level of thin-slicedness, it's really about average. Place the other slice of bread butter side up atop the sammich and turn the stove's flame on to about medium. You'll soon hear the butter begin to sizzle, and once it does, flip the sammich over and press down upon it gently with your spatula to add pressure. That accelerates the heating of cheese and ham and facilitates an even, creamy melting of the cheese. (NOTE: I recommend getting an actual hand press like the one seen below. The handle allows you to press the sammich-length metal surface with a more even distribution than the average spatula allows.)

My trusty sammich press, wrapped in foil to save the hassle of cleaning its embossed surface.

After about a minute of this the side of the sammich that's on the griddle should be somewhat crisp and golden brown, so again you flip the sammich and press again. In no time this side of the sammich should match the previously-done side for crispness and golden brown color, and it should have lost little or none of the cheese on the griddle's surface. (One of the advantages to the thin slicing and placement of the cheese.) When it's ready to hit your plate, the sammich should look like this:

Voila! The perfect grilled ham 'n' cheese sammich!

Once it's on your plate, cut it diagonally and start at one of the pointy ends. Your taste buds will thank you most profusely. And for the more adventurous of you out there, try making this with sliced rings of raw white or Spanish onions. Oh, yeah...

Wednesday, November 10, 2010

CHILI EL BUNCHO

INGREDIENTS:

1 lb. of ground beef (turkey may also be used if you don't do red meat)
1 lb. of ground pork
48 ounces of beef broth (I favor College Inn)
1 28 oz. can of crushed tomatoes  (and 1 15 oz. can as backup, in case you want more)
1 large Spanish onion, diced (or 2, if you like)
1 diced green pepper (optional)
1 box Birds Eye sweet kernel corn (optional)
4 cloves of cracked garlic (or as much as you like, but this quantity is a good starter guideline)
Cumin (to taste)
Chili powder (to taste)
1 packet Old El Paso taco seasoning (NOT the chili mix)
4 Bay leaves
1 1lb. 13 oz. can of red kidney beans
1 15,5 oz. can of dark kidney beans
1 cube Maggi beef bullion (optional; to be used if you want mild salt content; never use more than two)

FINISHED YIELD: Approximately fourteen measuring cups worth of chili.

Brown meat and combine with crushed tomatoes in a soup pot. Add diced onion, green pepper, garlic, corn (optional), taco seasoning, cumin, chili powder, Bay leaves and beef broth. Stir until well blended. Bring to a boil and lower flame to a simmer, then add beans (and optional bullion cube) and continue to occasionally stir. Simmer until the chili reaches desired thickness (I recommend roughly 2 hours), and if not as thick as preferred, use a potato masher to mash up some of the beans in the pot about halfway through the cook-time. It will thicken up quite nicely after that.

The completed beautifulness.

IMPORTANT NOTE: this chili recipe is fairly mild, making it suitable for general consumption and feeding to innocent children. If you’re one of those masochists who cannot enjoy chili unless it makes your asshole burn like nitric acid had just been schlamped up your turd hatch, you can add whatever kind of peppers you wish, and in that case I recommend either diced jalapeños (quantity determined by individual tolerance to gastrointestinal agony) or four fresh perforated Scotch bonnets (the perforation prevents the bonnets from exploding when their internal pressure builds as they simmer). Just keep in mind that Scotch bonnets are some seriously spicy shit that is best not fucked with by amateurs.

Saturday, May 22, 2010

SLOW-COOKED PORK TACOS EL BUNCHO

Try this one out if you have a crock pot (I recommend the trusty Hamilton Beach for beginners). I made it last night, and it knocked out Jessica, my buddy who was raised in Arizona and knows from quality authentic tacos.

INGREDIENTS (to be altered to fit however many people you're serving, but this version has the four people in mind and will last in the fridge for a good five days)

3 pounds boneless pork for stew
1 pound pork fat (optional, but it doesn't hurt to use this solely for adding flavor and richness to the meat, plus it will be drained off when the meat is done)
3 packets Sazon Goya Con Culantro y Achiote
2 tablespoons of Sazon Completa (I favor Badia as brand of preference)
Black pepper (to taste)
1 tablespoon of salt
1 small onion, chopped fine
6 cracked cloves of garlic
1 package of tortillas (size is up to you, and I favor Pepito brand)

Put meat (and optional fat) into the crock pot and apply the seasonings, onion and garlic. Then add just enough water to cover everything. Stir so everything is blended together, cover and turn crock pot on to the "LOW" setting. Let it cook for two hours undisturbed, then stir and cover again. Let it continue to slow cook for another three hours until fork tender, after which 95% of the broth gets poured off and discarded (or saved as stock for future batches; it freezes well) and the meat put away over night to find its final flavor. You can eat it immediately if you like and it will be quite good, but there's something to be said for how it tastes after it's had time to settle into itself. The broth that remains in the meat is vital for maintaining its moisture during reheating, and when serving it up make sure to strain the meat, because if left with too much broth it will make the tortilla about as effective to hold as a wet paper towel.

This basic meat concoction is great in soft tortilla tacos or served with rice and beans and plantains. And when seasoning it when in taco form, I suggest tarting it up with a bit of the mild green variety of Tabasco sauce. It won't burn anyone's asshole out and its subtle flavor enhances rather than overpowers the taco. You can also add chopped onions, radishes, guacamole, tomatoes, cheese or whatever to complete your taco — and imminent toilet-busting — experience.